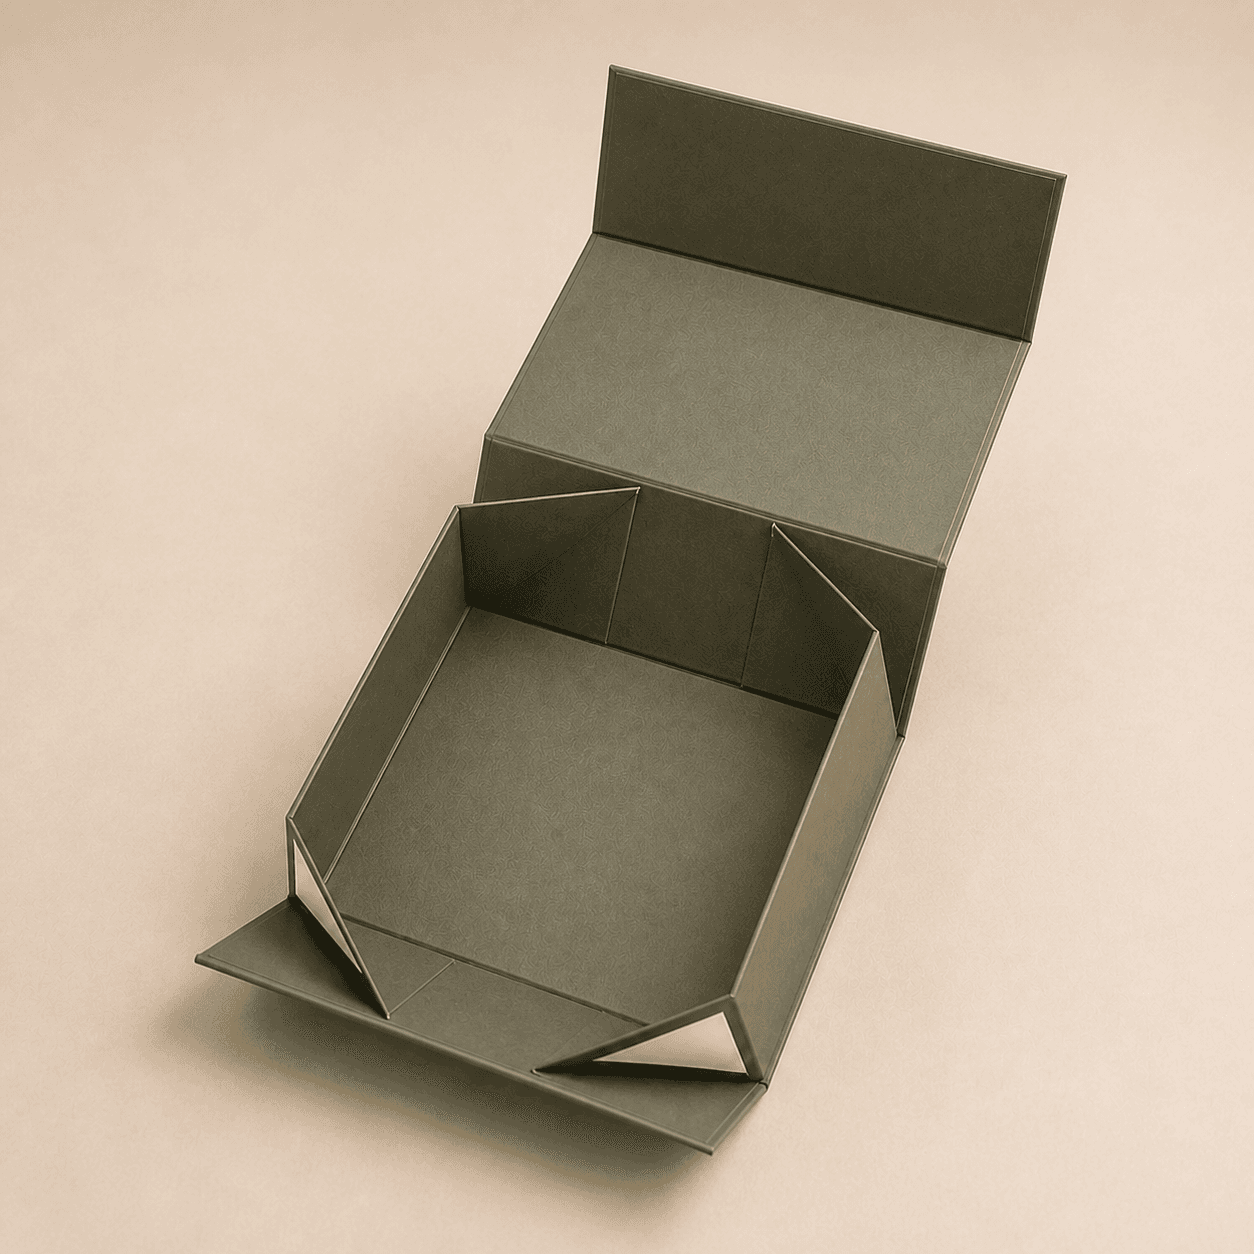
How to Measure a Product for Custom Packaging
Measure the packed product, record the arrangement, and send product dimensions before assuming final box dimensions or requesting a structure-specific dieline.

Start by measuring the product that will actually be packed and record length, width, and height in one consistent unit. For sets, map the full arrangement and note the weight, orientation, accessories, and insert needs. Product measurements are planning inputs; final packaging dimensions require structural review.
The packed product
Include caps, pumps, accessories, and any component that must fit inside the final pack.
Single item or set
Show whether products sit side by side, stack, or need a fixed presentation order.
Do not add a guessed allowance
Send the actual measurements and let the final structure and tolerances be reviewed for the project.
Measure the product before the package
The safest starting point is the item or complete set that will go inside the packaging. A guessed box size can hide whether the product, closure, insert, or opening sequence has actually been considered.
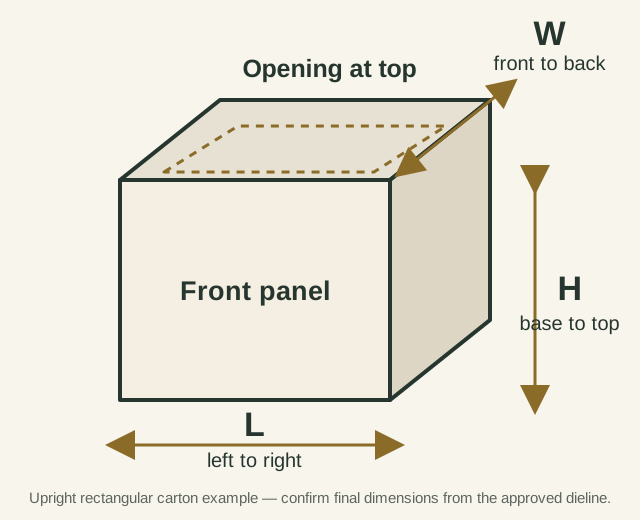
Use one clear orientation for an upright rectangular carton
For a fast first brief, place an upright rectangular carton with its front panel facing you and its opening upward. In that example, L runs left to right across the front panel, W runs from front to back, and H runs from base to top. This is an oriented carton example, not a universal rule for every packaging structure.
For mailers, irregular packs, and other structures, use the labels shown on the agreed project dieline. Before final artwork, UPG confirms the applicable dimension basis and structural orientation.
Record length, width, height, and basis consistently
- What to record
- Left to right across the front panel in the upright-carton example
- Common mistake to avoid
- Assuming the longest face is always L for every structure
- What to record
- Front to back in the upright-carton example
- Common mistake to avoid
- Omitting protruding parts such as pumps or closures
- What to record
- Base to top in the intended packed orientation
- Common mistake to avoid
- Measuring only the main body of the product
- What to record
- Product, required internal pack, or required external shipping dimensions
- Common mistake to avoid
- Leaving the basis unstated
- What to record
- Inches or millimeters, used consistently
- Common mistake to avoid
- Mixing inches and millimeters in one set of values
- What to record
- Product or complete set weight where relevant
- Common mistake to avoid
- Treating weight as optional for an insert-led or presentation project
| Field | What to record | Common mistake to avoid |
|---|---|---|
| Length (L) | Left to right across the front panel in the upright-carton example | Assuming the longest face is always L for every structure |
| Width (W) | Front to back in the upright-carton example | Omitting protruding parts such as pumps or closures |
| Height (H) | Base to top in the intended packed orientation | Measuring only the main body of the product |
| Measurement basis | Product, required internal pack, or required external shipping dimensions | Leaving the basis unstated |
| Unit | Inches or millimeters, used consistently | Mixing inches and millimeters in one set of values |
| Weight | Product or complete set weight where relevant | Treating weight as optional for an insert-led or presentation project |
Measure internal dimensions between the inside faces of the erected box, and external dimensions from outside edge to outside edge. An insert can reduce the space available for the product, so identify it separately. Send actual measurements instead of subtracting an assumed board thickness.
The labels above are a communication convention for the enquiry, not approval of a final structure or tolerance.
Prevent a size or structure mismatch
A box can match the stated dimensions and still be wrong for the product if those measurements describe the outside of an old box instead of the space the contents need. Label each measurement before the structure is reviewed.
- What to check before the quote
- Say whether the dimensions are internal or external, and send the product measurements separately.
- What to check before the quote
- Measure the complete item in its packed orientation, including every protruding part.
- What to check before the quote
- Send each item's dimensions and weight, a layout sketch, and the insert or divider requirement.
- What to check before the quote
- Share the full packed weight, product type, arrangement, expected handling and delivery route. Ask for the board and interior packaging to be reviewed together.
| Situation | What to check before the quote |
|---|---|
| You measured an existing box | Say whether the dimensions are internal or external, and send the product measurements separately. |
| A pump, cap, handle, or accessory projects beyond the main body | Measure the complete item in its packed orientation, including every protruding part. |
| Several products share one box | Send each item's dimensions and weight, a layout sketch, and the insert or divider requirement. |
| The contents are heavy or fragile | Share the full packed weight, product type, arrangement, expected handling and delivery route. Ask for the board and interior packaging to be reviewed together. |
E-flute or C-flute: start with the complete packout
Weight alone does not decide the flute. Board construction and grade, box dimensions, inserts, stacking, and the distribution route all affect the review. A larger flute can offer different cushioning and compression characteristics, but changing from E-flute to C-flute is not an automatic fix for a heavy product. Ask which construction and any relevant performance testing fit the complete packout before approving the structure.
For a multi-product set
- List every item and its individual dimensions.
- Show the intended arrangement with a simple top-view sketch or labelled photograph.
- State which face should be visible first when the box opens.
- Include accessories, cards, cables, applicators, or literature that must be packed.
- Note whether the arrangement must stay fixed with an insert.
For a flexible package
Share the product, target fill, finished-pack preference, closure or valve requirement, and filling or sealing process when known. A flat product measurement alone may not define a finished pouch because the contents, fill volume, film, seals, and pack format still require review.
For an existing package
If you want to review an existing structure, send clear photographs and label whether the measurements are internal, external, or taken from the product. Do not assume an old dieline will transfer to a different material, product arrangement, or manufacturing specification.
What happens after measurement
UPG uses the measurements as project inputs. The applicable structure, clearances, material, insert, panel layout, and final dimensions are then reviewed before final artwork is placed on an approved project dieline.
Frequently asked questions
What is the difference between internal and external box dimensions?
Internal dimensions are measured between the inside faces of the erected box. External dimensions are measured from outside edge to outside edge. Label the basis and unit, identify any insert, and send the product measurements separately when fit needs review. Do not estimate internal space by subtracting an assumed board thickness.
Should I send product dimensions or final box dimensions?
Send product dimensions first when the final structure has not been confirmed. Label every figure as product, required internal pack, or required external shipping dimensions, and include the unit. If you also have a target box size, label it as a target rather than an approved production dimension.
Which way should I measure an upright rectangular carton?
For UPG's first-brief example, face the front panel toward you with the opening upward: L is left to right across the front, W is front to back, and H is base to top. This example does not replace the agreed dieline labels for mailers or other structures.
Can I combine several products in one measurement?
For a set, provide individual measurements plus the intended full arrangement. A labelled photograph or simple sketch helps explain orientation without replacing structural review.
Does UPG publish universal dielines by size?
No. Final dielines are coordinated for the reviewed project structure because material, construction, dimensions, closures, inserts, and manufacturing requirements can change the file.
Sources used for this guide
FEFCO/ESBO Code of Designs
Primary corrugated-packaging reference for stated internal dimensions and opening-based orientation; final project conventions remain structure specific.
Open primary source ↗Fibre Box Association — What is Corrugated
Flute profiles, combined board construction, and interior packaging affect structural selection.
Open primary source ↗ISTA — Selecting and Using Test Procedures
Product weight, dimensions, materials, interior packaging, closures, and the distribution route affect package-performance review.
Open primary source ↗